Skip to content
  • Suomeksi
  • In English
  • Networking
    • WiFi/WLAN
    • MikroTik
    • Ubiquiti
  • Security
    • General
    • Wireless
  • Software
    • WiFi
    • WordPress

GCP Unifi Controller startup script explained

This is a walkthrough of the Google Cloud Platform virtual machine startup script to launch full featured Unifi Controllers on demand.

GCP Unifi Controller startup script explained

See how-to instructions and a video in another article.

This script was written for Google Cloud Platform and Debian. It should be fairly straightforward to port to any other cloud platform. They have a similar way of accessing virtual machine metadata. The only other GCP specific function is gsutil rsync in the backup script.

Porting to other Linux distributions or Unices would take some more effort. If the destination system doesn’t use systemd then the services and timers should be rewritten. The script also uses apt-get to install packages, but that is fairly easy to edit. Ubiquiti only provides a dpkg package for the controller, though.

I have tried to write the script in open style without shortcuts. A lot of the ifs could be streamlined, but I value legibility. The resulting system is also easy to reconfigure, if you are familiar with Unix command line. The list of files is at the end of the article.

#
# Set up logging for unattended scripts and UniFi's MongoDB log
# Variables $LOG and $MONGOLOG are used later on in the script.
#
LOG="/var/log/unifi/gcp-unifi.log"
if [ ! -f /etc/logrotate.d/gcp-unifi.conf ]; then
	cat > /etc/logrotate.d/gcp-unifi.conf <<_EOF
$LOG {
	monthly
	rotate 4
	compress
}
_EOF
	echo "Script logrotate set up"
fi
MONGOLOG="/usr/lib/unifi/logs/mongod.log"
if [ ! -f /etc/logrotate.d/unifi-mongod.conf ]; then
	cat > /etc/logrotate.d/unifi-mongod.conf <<_EOF
$MONGOLOG {
	weekly
	rotate 10
	copytruncate
	delaycompress
	compress
	notifempty
	missingok
}
_EOF
	echo "MongoDB logrotate set up"
fi

Although most users won’t ever log on to the virtual machine, I still find it worthwhile to write a log. This log will only contain unattended script actions like database repairs or certificate updates every 3 months or so. Not much volume, but it is still good practice to set up logrotate. Four months will cover the last certificate update. For some reason Ubiquiti doesn’t set up logrotate for their MongoDB instance so we’ll cover that as well.

#
# Turn off IPv6 for now
#
if [ ! -f /etc/sysctl.d/20-disableIPv6.conf ]; then
	echo "net.ipv6.conf.all.disable_ipv6=1" > /etc/sysctl.d/20-disableIPv6.conf
	sysctl --system > /dev/null
	echo "IPv6 disabled"
fi

I found out that occasionally the UniFi controller will try to bind to IPv6 only. GCP doesn’t route IPv6 to the virtual machines at this time, so we can just as well turn it off.

#
# Update DynDNS as early in the script as possible
#
ddns=$(curl -fs -H "Metadata-Flavor: Google" "http://metadata.google.internal/computeMetadata/v1/instance/attributes/ddns-url")
if [ ${ddns} ]; then
	curl -fs ${ddns}
	echo "Dynamic DNS accessed"
fi

If the user supplied a dynamic DNS service URL we’ll call it as early as possible so the DNS has a couple of minutes to settle before we’ll need it for Let’s Encrypt certificate at the end of the script.

#
# Create a swap file for small memory instances and increase /run
#
if [ ! -f /swapfile ]; then
	memory=$(free -m | grep "^Mem:" | tr -s " " | cut -d " " -f 2)
	echo "${memory} megabytes of memory detected"
	if [ -z ${memory} ] || [ "0${memory}" -lt "2048" ]; then
		fallocate -l 2G /swapfile
		chmod 600 /swapfile
		mkswap /swapfile >/dev/null
		swapon /swapfile
		echo '/swapfile none swap sw 0 0' >> /etc/fstab
		echo 'tmpfs /run tmpfs rw,nodev,nosuid,size=400M 0 0' >> /etc/fstab
		mount -o remount,rw,nodev,nosuid,size=400M tmpfs /run
		echo "Swap file created"
	fi
fi

If the memory of the virtual machine is less than 2GB (or we can’t find out) we’ll create a 2GB swap file and register it on /etc/fstab. The size of default tmpfs mounted at /run also depends on the amount of memory. On a small machine /run may be too small to create backups so we’ll set it to 400M. Tmpfs will be swapped out as needed, so it won’t consume real memory.

#
# Set the time zone
#
tz=$(curl -fs -H "Metadata-Flavor: Google" "http://metadata.google.internal/computeMetadata/v1/instance/attributes/timezone")
if [ ${tz} ] && [ -f /usr/share/zoneinfo/${tz} ]; then
	apt-get -qq install -y dbus >/dev/null
	if ! systemctl start dbus; then
		echo "Trying to start dbus"
		sleep 15
		systemctl start dbus
	fi
	if timedatectl set-timezone $tz; then echo "Localtime set to ${tz}"; fi
	systemctl reload-or-restart rsyslog
fi

If the user supplied a timezone reference we’ll check whether it exists on Debian. To set the timezone properly we need DBus. It is finicky and often won’t start on first try. We retry right away and if needed a third time 15 seconds later. RSysLog is already running but it needs to be made aware of the new local time.

#
# Add Unifi to APT sources
#
if [ ! -f /etc/apt/trusted.gpg.d/unifi-repo.gpg ]; then
	echo "deb http://www.ubnt.com/downloads/unifi/debian stable ubiquiti" > /etc/apt/sources.list.d/unifi.list
	curl -Lfs -o /etc/apt/trusted.gpg.d/unifi-repo.gpg https://dl.ubnt.com/unifi/unifi-repo.gpg
	echo "Unifi added to APT sources";
fi

If the file doesn’t exist we’ll add the Ubiquiti repo and its GPG key to APT sources.

#
# Add backports if it doesn't exist
#
release=$(lsb_release -a 2>/dev/null | grep "^Codename:" | cut -f 2)
if [ ${release} ] && [ ! -f /etc/apt/sources.list.d/backports.list ]; then
	cat > /etc/apt/sources.list.d/backports.list <<_EOF
deb http://deb.debian.org/debian/ ${release}-backports main
deb-src http://deb.debian.org/debian/ ${release}-backports main
_EOF
	echo "Backports (${release}) added to APT sources"
fi

CertBot should be installed from the backports repo. The repo definition needs the codename for the release, so we need to figure it out first. Google provided images should contain this by default, but we’ll check for it just in case.

#
# Install stuff
#
if [ ! -f /usr/share/misc/apt-upgraded ]; then
	apt-get -qq update -y >/dev/null
	apt-get -qq upgrade -y >/dev/null
	touch /usr/share/misc/apt-upgraded
	echo "System upgraded"
fi

Update the APT package list and upgrade the system to the latest on the first run only. We’ll leave a flag file in /var/share/misc so the next boots won’t be delayed. Unattended Upgrades will keep the system up to date on a daily basis.

haveged=$(dpkg-query -W --showformat='${Status}\n' haveged 2>/dev/null)
if [ "x${haveged}" != "xinstall ok installed" ]; then 
	if apt-get -qq install -y haveged >/dev/null; then
		echo "Haveged installed"
	fi
fi

Haveged provides entropy for the random number generator needed for encryption. Cloud based virtual machines don’t have access to entropy sources like ordinary computers do, which may delay booting 30 minutes or more.

certbot=$(dpkg-query -W --showformat='${Status}\n' certbot 2>/dev/null)
if [ "x${certbot}" != "xinstall ok installed" ]; then
if (apt-get -qq install -y -t ${release}-backports certbot >/dev/null) || (apt-get -qq install -y certbot >/dev/null); then
		echo "CertBot installed"
	fi
fi

CertBot is the tool to acquire and renew Let’s Encrypt certificates. According to EFF docs it should be installed from backports, but this occasionally gives errors. We try the backports first and then the default repos if it fails.

unifi=$(dpkg-query -W --showformat='${Status}\n' unifi 2>/dev/null)
if [ "x${unifi}" != "xinstall ok installed" ]; then
	if apt-get -qq install -y unifi >/dev/null; then
		echo "Unifi installed"
	fi
	systemctl stop mongodb
	systemctl disable mongodb
fi

UniFi Controller is the beef.

UniFi Controller will install and enable MongoDB, even though the service is never used. UniFi Controller will start its own MongoDB instance instead. By stopping and disabling the stock MongoDB we’ll save some memory and processor cycles.

httpd=$(dpkg-query -W --showformat='${Status}\n' lighttpd 2>/dev/null)
if [ "x${httpd}" != "xinstall ok installed" ]; then
	if apt-get -qq install -y lighttpd >/dev/null; then
		cat > /etc/lighttpd/conf-enabled/10-unifi-redirect.conf <<_EOF
 \$HTTP["scheme"] == "http" {
	\$HTTP["host"] =~ ".*" { 
		url.redirect = (".*" => "https://%0:8443")
	}
}
_EOF
		systemctl reload-or-restart lighttpd
		echo "Lighttpd installed"
	fi
fi

Install Lighttpd and configure it to redirect plain http requests to https on port 8443. Lighttpd needs to be reloaded after the configuration change.

f2b=$(dpkg-query -W --showformat='${Status}\n' fail2ban 2>/dev/null)
if [ "x${f2b}" != "xinstall ok installed" ]; then 
	if apt-get -qq install -y fail2ban >/dev/null; then
			echo "Fail2Ban installed"
	fi
	if [ ! -f /etc/fail2ban/filter.d/unifi-controller.conf ]; then
		cat > /etc/fail2ban/filter.d/unifi-controller.conf <<_EOF
[Definition]
failregex = ^.* Failed .* login for .* from \s*$
_EOF
		cat > /etc/fail2ban/jail.d/unifi-controller.conf <<_EOF 
[unifi-controller] 
filter = unifi-controller 
port = 8443 
logpath = /var/log/unifi/server.log 
_EOF 
	fi 

# The .local file will be installed in any case cat > /etc/fail2ban/jail.d/unifi-controller.local <<_EOF
[unifi-controller]
enabled  = true
maxretry = 3
bantime  = 3600
findtime = 3600
_EOF
	systemctl reload-or-restart fail2ban
fi

Fail2Ban will protect the controller from brute-force login attacks. We need three files for it: the filter contains the regex, the jail file contains the generic settings and the local jail file for local setup. The two latter could be combined but I have submitted the first two upstream to Fail2Ban maintainers. If they are accepted they will eventually be installed automatically. Then we only need to create the local jail file.

#
# Set up unattended upgrades after 04:00 with automatic reboots
#
if [ ! -f /etc/apt/apt.conf.d/51unattended-upgrades-unifi ]; then
	cat > /etc/apt/apt.conf.d/51unattended-upgrades-unifi <<_EOF
Acquire::AllowReleaseInfoChanges "true";
Unattended-Upgrade::Origins-Pattern {
	"o=Debian,a=stable";
	"c=ubiquiti";
};
Unattended-Upgrade::Remove-Unused-Dependencies "true";
Unattended-Upgrade::Automatic-Reboot "true";
_EOF
	cat > /etc/systemd/system/timers.target.wants/apt-daily-upgrade.timer <<_EOF
[Unit]
Description=Daily apt upgrade and clean activities
After=apt-daily.timer
[Timer]
OnCalendar=4:00
RandomizedDelaySec=30m
Persistent=true
[Install]
WantedBy=timers.target
_EOF
	systemctl daemon-reload
	systemctl reload-or-restart unattended-upgrades
	echo "Unattended upgrades set up"
fi

By Google default only the security updates are installed automatically. This file will add all Debian stable updates and Ubiquiti updates to the automatic update schedule. If the update requires a restart or reboot, it will occur after 04:00 local time. This is the reason for setting the timezone.

#
# Set up automatic repair for broken MongoDB on boot
#
if [ ! -f /usr/local/sbin/unifidb-repair.sh ]; then
	cat > /usr/local/sbin/unifidb-repair.sh <<_EOF
#! /bin/sh
if ! pgrep mongod; then
	if [ -f /var/lib/unifi/db/mongod.lock ] \
	|| [ -f /var/lib/unifi/db/WiredTiger.lock ] \
	|| [ -f /var/run/unifi/db.needsRepair ] \
	|| [ -f /var/run/unifi/launcher.looping ]; then
		if [ -f /var/lib/unifi/db/mongod.lock ]; then rm -f /var/lib/unifi/db/mongod.lock; fi
		if [ -f /var/lib/unifi/db/WiredTiger.lock ]; then rm -f /var/lib/unifi/db/WiredTiger.lock; fi
		if [ -f /var/run/unifi/db.needsRepair ]; then rm -f /var/run/unifi/db.needsRepair; fi
		if [ -f /var/run/unifi/launcher.looping ]; then rm -f /var/run/unifi/launcher.looping; fi
		echo >> $LOG
		echo "Repairing Unifi DB on \$(date)" >> $LOG
		su -c "/usr/bin/mongod --repair --dbpath /var/lib/unifi/db --logappend --logpath ${MONGOLOG} 2>>$LOG" unifi
	fi
else
	echo "MongoDB is running. Exiting..."
	exit 1
fi
exit 0
_EOF
	chmod a+x /usr/local/sbin/unifidb-repair.sh

	cat > /etc/systemd/system/unifidb-repair.service <<_EOF
[Unit]
Description=Repair UniFi MongoDB database at boot
Before=unifi.service mongodb.service
After=network-online.target
Wants=network-online.target
[Service]
Type=oneshot
ExecStart=/usr/local/sbin/unifidb-repair.sh
[Install]
WantedBy=multi-user.target
_EOF
	systemctl enable unifidb-repair.service
	echo "Unifi DB autorepair set up"
fi

This section will create a script to in /usr/local/sbin to repair MongoDB if necessary. Then it will create a system.d unit to launch the script at every boot before Unifi and MongoDB are started.

In the script the first condition checks if MongoDB is running. The script should be run by systemd at boot before UniFi is started, but the check is there just in case someone runs this as a command. The script is executable by anyone and /usr/local/sbin is in root’s path so this is a possibility.

If the MongoDB is shut down improperly it will leave lock files, which indicate a repair operation is needed. UniFi controller may add flag files that the startup is looping or the database is broken. If any of these files is found, they are all removed and MongoDB repair is attempted.

At last we’ll create the unit file for a service and enable it so this will be run automatically at boot.

#
# Set up daily backup to a bucket after 01:00
#
bucket=$(curl -fs -H "Metadata-Flavor: Google" "http://metadata.google.internal/computeMetadata/v1/instance/attributes/bucket")
if [ ${bucket} ]; then
	cat > /etc/systemd/system/unifi-backup.service <<_EOF
[Unit] Description=Daily backup to ${bucket}
service After=network-online.target
Wants=network-online.target
[Service] Type=oneshot
ExecStart=/usr/bin/gsutil rsync -r -d /var/lib/unifi/backup gs://$bucket
_EOF

	cat > /etc/systemd/system/unifi-backup.timer <<_EOF
[Unit]
Description=Daily backup to ${bucket} timer
[Timer]
OnCalendar=1:00
RandomizedDelaySec=30m
[Install]
WantedBy=timers.target
_EOF
	systemctl daemon-reload
	systemctl start unifi-backup.timer
	echo "Backups to ${bucket} set up"
fi

If the user has specified a bucket we’ll create two systemd unit files. One for a timer to run once a day and a service to actually execute the rsync command.

The unit files are rewritten at every boot in case the user has changed the destination bucket. One could argue that there is no point in enabling the service, since it is also started at every boot. Enabling does very little harm and perhaps one day the script isn’t loaded for some error.

#
# Set up Let's Encrypt
#
dnsname=$(curl -fs -H "Metadata-Flavor: Google" "http://metadata.google.internal/computeMetadata/v1/instance/attributes/dns-name")
if [ -z ${dnsname} ]; then exit 0; fi
privkey=/etc/letsencrypt/live/${dnsname}/privkey.pem
pubcrt=/etc/letsencrypt/live/${dnsname}/cert.pem
chain=/etc/letsencrypt/live/${dnsname}/chain.pem
caroot=/usr/share/misc/ca_root.pem

Setting up Let’s Encrypt reliably turned out to be messy. At first we check whether the user supplied a DNS name and if not then we are done. We also set some file paths for shorthand.

if [ ! -f $caroot ]; then
	cat > $caroot <<_EOF
-----BEGIN CERTIFICATE-----
MIIDSjCCAjKgAwIBAgIQRK+wgNajJ7qJMDmGLvhAazANBgkqhkiG9w0BAQUFADA/
MSQwIgYDVQQKExtEaWdpdGFsIFNpZ25hdHVyZSBUcnVzdCBDby4xFzAVBgNVBAMT
DkRTVCBSb290IENBIFgzMB4XDTAwMDkzMDIxMTIxOVoXDTIxMDkzMDE0MDExNVow
PzEkMCIGA1UEChMbRGlnaXRhbCBTaWduYXR1cmUgVHJ1c3QgQ28uMRcwFQYDVQQD
Ew5EU1QgUm9vdCBDQSBYMzCCASIwDQYJKoZIhvcNAQEBBQADggEPADCCAQoCggEB
AN+v6ZdQCINXtMxiZfaQguzH0yxrMMpb7NnDfcdAwRgUi+DoM3ZJKuM/IUmTrE4O
rz5Iy2Xu/NMhD2XSKtkyj4zl93ewEnu1lcCJo6m67XMuegwGMoOifooUMM0RoOEq
OLl5CjH9UL2AZd+3UWODyOKIYepLYYHsUmu5ouJLGiifSKOeDNoJjj4XLh7dIN9b
xiqKqy69cK3FCxolkHRyxXtqqzTWMIn/5WgTe1QLyNau7Fqckh49ZLOMxt+/yUFw
7BZy1SbsOFU5Q9D8/RhcQPGX69Wam40dutolucbY38EVAjqr2m7xPi71XAicPNaD
aeQQmxkqtilX4+U9m5/wAl0CAwEAAaNCMEAwDwYDVR0TAQH/BAUwAwEB/zAOBgNV
HQ8BAf8EBAMCAQYwHQYDVR0OBBYEFMSnsaR7LHH62+FLkHX/xBVghYkQMA0GCSqG
SIb3DQEBBQUAA4IBAQCjGiybFwBcqR7uKGY3Or+Dxz9LwwmglSBd49lZRNI+DT69
ikugdB/OEIKcdBodfpga3csTS7MgROSR6cz8faXbauX+5v3gTt23ADq1cEmv8uXr
AvHRAosZy5Q6XkjEGB5YGV8eAlrwDPGxrancWYaLbumR9YbK+rlmM6pZW87ipxZz
R8srzJmwN0jP41ZL9c8PDHIyh8bwRLtTcm1D9SZImlJnt1ir/md2cXjbDaJWFBM5
JDGFoqgCWjBH4d1QB7wCCZAA62RjYJsWvIjJEubSfZGL+T0yjWW06XyxV3bqxbYo
Ob8VZRzI9neWagqNdwvYkQsEjgfbKbYK7p2CNTUQ
-----END CERTIFICATE-----
_EOF
fi

This cross-signed certificate is required for the import process. You should check it matches the original (courtesy of Steve Jenkins).

Next we’ll write a deploy hook that CertBot will automatically run every time it has renewed a certificate. We need to massage and then import the new certificate to Java keystore for UniFi.

if [ ! -d /etc/letsencrypt/renewal-hooks/deploy ]; then
	mkdir -p /etc/letsencrypt/renewal-hooks/deploy
fi
cat > /etc/letsencrypt/renewal-hooks/deploy/unifi <<_EOF 
#! /bin/sh
if [ -e $privkey ] && [ -e $pubcrt ] && [ -e $chain ]; then 
	echo >> $LOG
	echo "Importing new certificate on \$(date)" >> $LOG
	p12=\$(mktemp)
	
	if ! openssl pkcs12 -export \\
	-in $pubcrt \\
	-inkey $privkey \\
	-CAfile $chain \\
	-out \${p12} -passout pass:aircontrolenterprise \\
	-caname root -name unifi >/dev/null ; then
		echo "OpenSSL export failed" >> $LOG
		exit 1
	fi
	
	if ! keytool -delete -alias unifi \\
	-keystore /var/lib/unifi/keystore \\
	-deststorepass aircontrolenterprise >/dev/null ; then
		echo "KeyTool delete failed" >> $LOG
	fi
	
	if ! keytool -importkeystore \\
	-srckeystore \${p12} -srcstoretype PKCS12 \\
	-srcstorepass aircontrolenterprise \\
	-destkeystore /var/lib/unifi/keystore \\
	-deststorepass aircontrolenterprise \\
	-destkeypass aircontrolenterprise \\
	-alias unifi -trustcacerts >/dev/null; then
		echo "KeyTool import failed" >> $LOG
		exit 2
	fi
	
	systemctl stop unifi
	if ! java -jar /usr/lib/unifi/lib/ace.jar import_cert \\
	$pubcrt $chain $caroot >/dev/null; then
		echo "Java import_cert failed" >> $LOG
		systemctl start unifi
		exit 3
	fi
	systemctl start unifi
	rm -f \${p12}
	echo "Success" >> $LOG
else
	echo "Certificate files missing" >> $LOG
	exit 4
fi
_EOF
chmod a+x /etc/letsencrypt/renewal-hooks/deploy/unifi

There are many steps where this may fail. The exit codes and the log will hint what went wrong. It is still important to restart the UniFi controller to be of any service. The only error which won’t cause premature exit is keytool delete. If it fails, then most of the time the keytool import will also fail, causing exit.

Next we’ll create a script in /usr/local/sbin to run the CertBot. This way we can use it in a timer if we don’t succeed the first time:

cat > /usr/local/sbin/certbotrun.sh <<_EOF 
#! /bin/sh 
extIP=\$(curl -fs -H "Metadata-Flavor: Google" "http://metadata.google.internal/computeMetadata/v1/instance/network-interfaces/0/access-configs/0/external-ip") 
dnsIP=\$(getent hosts ${dnsname} | cut -d " " -f 1) 
echo >> $LOG
echo "CertBot run on \$(date)" >> $LOG
if [ \${extIP} = \${dnsIP} ]; then
	if [ ! -d /etc/letsencrypt/live/${dnsname} ]; then
		systemctl stop lighttpd
		if certbot certonly -d $dnsname --standalone --agree-tos --register-unsafely-without-email >> $LOG; then
			echo "Received certificate for ${dnsname}" >> $LOG
		fi
		systemctl start lighttpd
	fi
	if /etc/letsencrypt/renewal-hooks/deploy/unifi; then
		systemctl stop certbotrun.timer
		echo "Certificate installed for ${dnsname}" >> $LOG
	fi
else
	echo "No action because ${dnsname} doesn't resolve to ${extIP}" >> $LOG
fi
_EOF
chmod a+x /usr/local/sbin/certbotrun.sh

First we need to figure out the external IP of the VM and the IP address of the user-supplied DNS name. If they match and we don’t yet have a certificate for the domain, we’ll try. We need to shutdown Lighttpd for the time because CertBot may need port 80 as well. If we succeed we need to run the deploy hook manually, since it is run automatically only for renewals. In case this was a timer job, we’ll stop the timer after success.

If we don’t succeed on the first try, we’ll run the CertBot once an hour as a timer job. This requires two unit files and a systemd reload:

cat > /etc/systemd/system/certbotrun.timer <<_EOF 
[Unit] Description=Run CertBot hourly until success 
[Timer] OnCalendar=hourly 
RandomizedDelaySec=15m 
[Install] 
WantedBy=timers.target 
_EOF 

systemctl daemon-reload cat > /etc/systemd/system/certbotrun.service <<_EOF
[Unit]
Description=Run CertBot hourly until success
After=network-online.target
Wants=network-online.target
[Service]
Type=oneshot
ExecStart=/usr/local/sbin/certbotrun.sh
_EOF

This short part will set the Let’s Encrypt machinery rolling:

if [ ! -d /etc/letsencrypt/live/${dnsname} ]; then
	if ! /usr/local/sbin/certbotrun.sh; then
		echo "Installing hourly CertBot run"
		systemctl start certbotrun.timer
	fi
fi

If there is no certificate yet, we’ll run the script manually. If it fails, we’ll start the timer.

List of files

These files are created or modified by the script. You can edit these to your needs once the system is up. In the order of appearance:

  • /etc/logrotate.d/gcp-unifi.conf
  • /etc/logrotate.d/unifi-mongod.conf
  • /etc/sysctl.d/20-disableIPv6.conf
  • /etc/fstab
  • /etc/apt/sources.list.d/unifi.list
  • /etc/apt/sources.list.d/backports.list
  • /etc/lighttpd/conf-enabled/10-unifi-redirect.conf
  • /etc/fail2ban/filter.d/unifi-controller.conf
  • /etc/fail2ban/jail.d/unifi-controller.conf
  • /etc/fail2ban/jail.d/unifi-controller.local
  • /etc/apt/apt.conf.d/51unattended-upgrades-unifi
  • /etc/systemd/system/timers.target.wants/apt-daily-upgrade.timer
  • /usr/local/sbin/unifidb-repair.sh
  • /etc/systemd/system/unifidb-repair.service
  • /etc/systemd/system/unifi-backup.service (*)
  • /etc/systemd/system/unifi-backup.timer (*)
  • # /var/lib/unifi/system.properties (*)
  • /etc/letsencrypt/renewal-hooks/deploy/unifi (*)
  • /usr/local/sbin/certbotrun.sh (*)
  • /etc/systemd/system/certbotrun.timer
  • /etc/systemd/system/certbotrun.service

The starred files are rewritten at every boot if bucket or dnsname metadata fields are defined. If you want to edit them you need to remove the startup-script-url from the metadata.
System.properties file will be edited in place for xms and xmx (once Ubiquiti fixes a bug). You can edit other lines as required.

Links

  • How to use this script (with video)
  • See version history on GitHub
  • Download the current version
Author Petri RiihikallioPosted on 10.02.201816.12.2021Categories UbiquitiTags Ubiquiti32 Comments on GCP Unifi Controller startup script explained

Set up UniFi Controller on Google Cloud Platform

Google offers one free virtual machine on Google Cloud Platform. This script will make setting up a UniFi Controller on GCP a breeze and it includes all the goodies. No command line required, everything is done in the GCP Console and it takes 15 minutes total and that includes transferring your current sites to the cloud. You should try this!

Set up UniFi Controller on Google Cloud Platform

[2023/02] If you are impatient and want to upgrade your controller to the latest version, see Jonathan’s comment below. If you want to upgrade your Debian as well, see Derek’s comment. (Use the search in your browser!) I am still waiting for Ubiquiti to come up with an automatic upgrade without the command line.

[2022/12] UniFi Network 7.3 will REQUIRE Java 11. I don’t yet know how smooth the transition will be. I will do my best.

[Note 2021/12] If you are getting a certificate error then see Fix GCP UniFi Controller certificate. It is finally solved [with help from Djo and Derek]! Basically you just need to stop and start your VM.

[Note 2021/09] If you are still being charged for egress traffic, check your network tier. Apparently Premium is on the free offer and Standard is not! [Thanks, gman!]

[Note 2020/01] If Google has charged you for egress traffic to some remote areas of the globe, you can stop Lighttpd as a fix. Log in to the VM and type sudo systemctl stop lighttpd and sudo systemctl disable lighttpd. That means you will need to use the full https://my.ctrl.dns:8443 URL, but your browser should already know it by now.

The script I have created will set up an UniFi Controller on GCP with these extras:

  • Automatically acquire and install a Let’s Encrypt certificate to relieve you from HTTPS certificate warnings. For a certificate you need to have a domain name for your controller, dynamic or static.
  • Dynamic DNS support to help you set up the domain name.
  • You don’t need to type https://your.server.dns:8443 every time. You just type the DNS name of your controller and it will be redirected to HTTPS port 8443 automatically.
  • Backup files will be copied to a Google Storage bucket for offline storage.
  • Fail2Ban protects your controller from attackers trying to brute force the password: the IP address of the offender will be denied access for an hour after every three failed attempts.
  • The free tier GCP micro instance comes with only 600MB of memory. The script will create a swap file to accommodate the controller.
  • The underlying Linux system and UniFi Controller will be automatically updated to the latest stable releases.
  • If the MongoDB database supporting UniFi Controller needs repairing, a reboot will do the trick. There is a support script to run the repair commands as needed before the controller starts.
  • HAVEGEd will store entropy for encryption. Without sufficient entropy available rebooting the server may take 30 minutes or more.

None of this will cost a dime to try out. With a new account you will get credit for the first year. At least you can watch this 10 minute video to see the whole procedure including transferring your current controller:

(There are subtitles available under the YouTube gear icon)

1. Preliminaries

Take a backup of your current controller in Settings > Maintenance. This is always a good idea. You may also want first to improve your password. In Google Cloud your controller can be accessed by anyone who guesses your username and password. You don’t want that. Fail2Ban will lock the IP address for an hour after three failed attempts, but it won’t help if your password is guessable.

A proper SSL certificate requires a DNS name that points to your controller. You can register your own domain or use one of the free ones that dynamic DNS providers offer. If you want to use a dDNS service, you need to set it up first. There are links to some providers at the end. If you control your DNS yourself you won’t need dDNS.

Next you have to create an account on Google Cloud Platform. You will need a credit card for this, but the micro instance that Google offers for free is sufficient for a small UniFi Controller and the free 5GB on Cloud Storage is plenty for the backups. Google does not guarantee this offer will run forever, but it has run for years now and they will certainly let you know if this changes. The current price for a micro instance is $4.28 per month, if you need to run another for example.

First of all, use a good password or better yet, set up two factor authentication for your Google account. If someone breaks into your account the intruder could create a huge bill in just a few hours. You can also set a spending limit in Billing > Budgets & Alerts. Create a new budget for the whole billing account and set a budget. $50 or even $10 should be enough, if you ever want to do some testing on an extra controller for a few hours. The budget feature won’t protect you from an intruder breaking into your account, however. The first thing the intruder would do is to remove the limit.

If you set up budget alerts (50%, 90% and 100% by default) you need to nominate yourself to a billing administrator to receive the alert emails. This is done in IAM & Admin > IAM section. Locate your identity in the list and click in the Roles column. Check Billing > Project Billing Manager to add this role to your identity.

[UPDATE:] Some readers have reported that they needed to enable the storage API in APIs & Services > Dashboard > Enable APIs & Services > search for Google Cloud Storage JSON API > click Google Cloud Storage JSON API tile > click Enable button. My account had this enabled by default, but my account is older and perhaps the default has been changed. [Thank you Limbo and Chrysilis!]

2. Create a Storage Bucket (optional)

UniFi Controller will create backups automatically. The default is once a month, but you can change this in UniFi Controller > Settings > Auto Backup. I run backups once a week and keep the last 26 or a half year’s worth. These backups are stored on the computer the controller runs on. If this computer is lost for some reason, so are the backups. You should store them somewhere else and a Google Storage bucket is the perfect place. If you create a bucket the script will sync the backups to the bucket daily.

In GCP Console switch to Storage > Cloud Storage > Browser and create a new bucket. The bucket name has to be globally unique, so all the obvious ones are already in use. Use something like petri-office-unifi-backup. For the free offer select Region as the Location type and choose a Location in the U.S. I am in Europe and East Coast is marginally closer, so I use it.

3. Set Up the Virtual Network

This is something you will need to do only once. All your future UniFi controllers will use the same network settings.

Switch to Networking > VPC Network > Firewall. Create a new firewall rule and name it allow-unifi for example, the name isn’t important. In the Target tags field enter unifi. You can use any name for the tag, but you will need to remember it for the next step. In the Source IPv4 ranges type 0.0.0.0/0 to denote any address. In the Protocols and ports section select Specified protocols and ports and copy these into the TCP and UDP fields:

tcp: 8443,8080,8880,8843,6789,443,80
udp: 3478

Switch to  VPC Networks > External IP Addresses and click on Reserve Static Address. You need to give the address a name, choose the region where your virtual machine is going to run and click Reserve. I suggest you use the same region as the Storage bucket. You can’t attach the address yet, since you haven’t yet created the virtual machine. (Google will charge for the static addresses while they are not in use. The plan is to run the controller non-stop so this is not an issue. Just remember to release the address if you don’t need it any longer.) If you manage your DNS yourself, add an A record for this IP at this point.

4. Create the Virtual Machine

In Compute > Compute Engine > VM Instances create a new instance. You can name it anything you like. Choose between Regions us-west1, us-central1 or us-east1 for the free offer. You need to place the VM in a Zone that is in the same region as the static address. The Machine type should be E2 series e2-micro for the free instance.

Click on Change for the Boot disk.  The default operating system is Debian  GNU/Linux 10 (Buster), but UniFi Controller is not supported on Buster. Change the version to Debian GNU/Linux 9 (Stretch) [Kudos to James!]. The default size is 10GB which suffices, but it is tricky to expand afterwards. The free offer is 30GB but I prefer to set the boot disk to 15GB in case I need to run another VM. To change the size, click on Change and set the size. Also change the Boot disk type to Standard persistent disk (not Balanced) to stay on the free tier [Thanks Steve!]  and then you are ready to click Select to save.

If you created a bucket for the backups, you need to allow the virtual machine to write to Google Storage. The default permission is Read Only. In Identity and API access choose Set access for each API. In the list that appears change Storage to Read Write.

No need to select the HTTP and HTTPS options in the Firewall section. You created your own firewall rules already.

Click on Networking, disks, security, management, sole-tenancy to open advanced options. In the Networking section add unifi to the Network Tags field. This tag ties the firewall rules you created earlier to this virtual machine instance. This step is easy to forget, but missing it will prevent access to your controller! Leave the hostname empty. Click on Default under Network Interfaces and choose the static IP address you created earlier as the External IP. Set Network Service Tier to Premium [apparently Premium is on the Free Tier. Thanks, gman!].

In the Management section add the following Metadata key/value pairs. The first one is mandatory: the script that does the magic. All the others are optional and the order doesn’t matter. There is no way to do any error checking or report script failures, some feature will just not work if the metadata is erroneous. You can come back and change them if necessary. The changes will take effect after next reboot. See the Maintenance section at the end for how to reboot.

Key Value Purpose
startup-script-url gs://petri-unifi/startup.sh Required!
ddns-url http://your.dyn.dns/update.php?key=xxxxx Helps you access the Controller
timezone Europe/Helsinki Lets you adjust the reboot hour
dns-name your.server.dns Required for HTTPS certificate
bucket your-bucket-name-here Required for offline backups

Some users have reported problems with the gs: style URL for the script. You can try https://storage.googleapis.com/petri-unifi/startup.sh instead [Thank you Miczita]

Click Create. Go get coffee. Even if the virtual machine appears to be running, the script is not done yet. It used to run in minutes, but give it a half an hour these days.

5. Set Up the Controller

Connect to your new controller. On the first screen of the UniFi wizard click restore from a previous backup and upload the latest backup. Wait for the restore to complete. Log on to the new controller using your old username and password. In Settings > Controller add the DNS name or the IP address of the new controller to Controller Hostname/IP field and check Override inform host with controller hostname/IP. Confirm the change. Click Apply Settings.

Connect to your old controller. Do the same change in Settings > Controller and add the DNS name or the IP address to Controller Hostname/IP field and check Override inform host with controller hostname/IP. This setting is for the current devices that are already associated with the current controller. Now they will start to contact the new controller in Google Cloud.

Connect to your new controller again. Check the devices page to see whether the devices come online eventually. If they don’t, you may have to force reprovisions them on the old controller. In that case go to the Devices page on the old controller, select each device in turn and on the Config tab click Provision under Manage Device.

[UPDATE:] The controller doesn’t log failed login attempts by default any more. Logging is required for Fail2Ban protection. You need to change the logging level of the controller: Settings > Maintenance > Services > Log level and change Mgmt to More and click Apply. [Thank you Gabe!]

How to Set Up a New Network with a GCP Controller

If you are starting from scratch you won’t have any controller backup to transfer to the GCP based UniFi Controller. In that case you have three alternatives:

  1. Install a temporary controller on a local computer, set up the network and transfer the controller to GCP as outlined above.
  2. If you want to do a pure cloud based installation, you’ll need to tell the devices the address of the controller. If you have an UniFi Security Gateway, connect its WAN interface to the Internet and your laptop directly to the LAN interface. Connect to the USG with a browser (https://192.168.1.1) and configure the inform URL to http://your.server.dns:8080/inform. Once you have adopted the USG in the controller other UniFi devices will appear in the controller as you start to connect them.
  3. If you have some other router than an USG, you can either set your DNS server to resolve name unifi to the IP address of your cloud controller or set the DHCP option 43 in your DHCP server. There are examples of both in Ubiquiti’s L3 Adoption Guide. The last resort is to SSH to each device in turn and use command
    set-inform http://your.server.dns:8080/inform.

Maintenance and troubleshooting

If your devices won’t switch to the new controller the reason is usually either in the firewall or DNS. Is your VPC firewall rule correct and does the network tag of the virtual machine match the tag on the rule? Is your DNS name correct both in the metadata and in both controllers’ Override Inform Host fields and does the DNS name point to the correct IP address? In either case the devices will try to connect for several minutes before reconnecting to the old controller. Sometimes it takes hours for DNS to settle, depending on the time-to-live settings. In that case let it sit overnight and force provision the devices next morning.

Let’s Encrypt limits the number of certificates issued per domain to five per week (at the time). This usually isn’t an issue, but if you use the free domains offered by dDNS providers, the most popular domains will have used this week’s five certificates already. In this case the script will try to acquire a certificate once an hour until it succeeds. You will see certificate warnings at first but the address bar should eventually turn green. You can also anticipate this and choose a less popular domain (or register your own).

Don’t set up two controllers to back up to the same bucket. They will delete each other’s backups. You can either create a new bucket or create folders inside the bucket. In the metadata set bucket to your-bucket/foldername.

Google blocks sending email directly to SMTP port 25 from within GCP because they don’t want all spammers on board. If you want to receive email notifications you need to set up authenticated SMTP on port 587 or 465 in UniFi’s Settings > Controller > Mail Server. You can use your personal email account or even use Google’s email engine if you can prove you are not a spammer.

The Cloud Console will typically start displaying a recommendation to increase performance by upgrading to a bigger virtual machine (at cost), even though the CPU utilisation graph typically stays below 15%. Apparently the updates the devices send cause very short spikes, because occasionally the devices report that the controller is busy. This may cause some inaccuracies in the reports, I am not certain. If you can live with that, just dismiss the suggestion. In my experience the micro instance can serve at least the same 30 devices a Cloud Key can. You can also use this script on any virtual machine type you like. When you select the machine type you see the cost per month. You get a better price if you can commit to use the resource for 1 or 3 years.

If the controller appears to be malfunctioning the first remedy is to reboot it. A reboot is also the way to re-run the script if you made changes to the metadata. The safe way to reboot is to Stop and then Start the virtual machine. This won’t change the IP address since you have reserved a static address. Don’t use the Reset button. A Reset will immediately restart the virtual machine, which may damage the UniFi database and/or the Linux filesystem (if you are really unlucky).

The underlying Linux system and UniFi Controller will be automatically updated to the latest stable releases. If an update requires a server restart or a reboot it will occur after 04AM UTC. Set the timezone metadata to adjust the reboot to 04AM local time. A reboot will make a captive wireless guest portal inaccessible for a couple of minutes so you don’t want it to happen during peak hours.

Automatically updating the system is a risk. For example there could be an update to Java or MongoDB that is incompatible with the installed UniFi controller. There is no way you could prevent the installation of the update. However, I decided that NOT updating the system is even bigger risk. I don’t trust the intended audience (you) to log on regularly over SSH and run apt-get. In any case, if the risk realizes I trust that it will be transient. The incompatibility will affect a lot of other users as well and there will be another update to solve the issue. This other update will be also automatically installed. If you are familiar with Linux you can also log on the VM and edit /etc/apt/apt.conf.d/51unattended-upgrades-unifi to your requirements.

The automatic update won’t do major Linux version upgrades. Every couple of years it is wise to upgrade the underlying operating system. The Cloud Way is to create a new UniFi controller:

  1. Take a backup of the old controller.
  2. Create a new bucket (or folder).
  3. Remove the static IP address from the old virtual machine (VPC Network > External IP Addresses and Change to None)
  4. Create a new virtual machine as outlined above and restore the backup
  5. Delete the old virtual machine
  6. Done! Since the IP address is the same there is no need to update any settings and the switchover is immediate.

If your controller starts to act up and rebooting doesn’t help, just create a new one. Just like upgrading the underlying Linux, create a new virtual machine. If you cannot connect to the old controller to retrieve the backup, use the latest auto backup in the storage bucket. That’s what they are for. Don’t fall in love with your virtual machine, you should treat them like pencils: very useful but replaceable.

If you are concerned about the security of the script you better read it through first (the link is at the end). Be aware that the script is in my bucket so I can update it as necessary. I could also make malicious changes that would take effect on your server after next boot (after a system update for instance). If you are cautious you should remove the whole startup-script-url row from the metadata as soon as you are happy with the other metadata settings. The script doesn’t do anything once the system is configured. If you ever need to reconfigure something you can just add the startup-script-url back, Stop and Start the VM to run the script and then remove the row again.

Google currently offers for free one micro instance with 30GB of disk space and 5GB of bucket storage in the U.S. regions. Both come with monthly 1GB of free egress (i.e. outbound) data transfer with China and Australia excluded. Egress data is used when you download backups to your computer and when your devices download upgrades from the controller. The static IP address is free as long as it is attached to a running virtual machine. You will be charged if you exceed these limits, but typically the charges are minuscule. For example when you upgrade your Linux you will run another micro instance for a while. The budget feature should protect you from nasty surprises.

Links

  • Google Cloud Platform Free Offer
  • Debian time zones (1/2018)
  • The startup script on Google Storage
  • Explanation and tech details of the startup script
  • My UniFi project on GitHub
  • UniFi – Device Adoption Methods

Some dynamic DNS providers and how their single line update URLs look like:

  • Afraid.org
    http://freedns.afraid.org/dynamic/update.php?xxxdynamicTokenxxx
  • DNSPark
    https://username:passsword@control.dnspark.com/api/dynamic/update.php?hostname=home.example.com
  • DuckDNS
    https://www.duckdns.org/update?domains={YOURVALUE}&token={YOURVALUE}
  • DynDNS
    https://{user}:{updater client key}@members.dyndns.org/v3/update?hostname={hostname}
  • Dynu [thank you Moses!]
    https://api.dynu.com/nic/update?hostname=HOSTNAME&alias=ALIAS&username=USERNAME&password=PASSWORD
  • EasyDNS
    https://username:dynamictoken@api.cp.easydns.com/dyn/generic.php?hostname=example.com
  • NameCheap
    https://dynamicdns.park-your-domain.com/update?host=[host]&domain=[domain_name]&password=[ddns_password]
  • Sitelutions
    https://dnsup.sitelutions.com/dnsup?id=990331&user=myemail@mydomain.com&pass=SecretPass
  • ZoneEdit
    https://<username>:<password>@dynamic.zoneedit.com/auth/dynamic.html?host=<hostname>
Author Petri RiihikallioPosted on 10.02.201821.02.2023Categories UbiquitiTags Ubiquiti1,179 Comments on Set up UniFi Controller on Google Cloud Platform

WiFi 5GHz band and wide channels

On 5GHz WiFi there are more channels and less interference, both are important for fast wireless communications. The bandwidth can even be increased multifold by combining channels.

WiFi 5GHz band and wide channels

5GHz was introduced in 802.11a, but the radios were expensive and the band didn’t gain popularity. 802.11n was defined for both 2.4GHz and 5GHz bands, which finally launched 5GHz use. The latest 802.11ac is only defined for 5GHz but all devices still support 802.11n and most also on 2.4GHz

Channels

The 5GHz band is divided into 5MHz channels like the 2.4GHz band. Fortunately only every fourth channel (36, 40, 44…) is used which provides for de facto 20MHz channel width without the overlap problems of 2.4GHz. Most devices even cannot be tuned to the intermediate channels. The whole 5–6GHz is not available since there are some forbidden channels and some channels have special restrictions.

5GHz Channels
5GHz Channels

Originally only the four lowest channels were available in the U.S. where they are called UNII-I. Later more channels have been made available, but they have several restriction for their use in the U.S.

In Europe (or in ETSI jurisdiction) channels 36–64 are restricted for indoor use only. The maximum transmission power is 200mW (23dBm), which is greater than the 100mW (20dBm) allowed for 2.4GHz, but still doesn’t quite compensate for the 6dB attenuation due to higher frequency. In access point use the maximum transmission power is practically irrelevant, since typical user devices have less transmit power. In WiFi the connection is always bidirectional so there is no point in receiving the access point if you cannot send a reply. Common default for access points is maximum power, which means 2.4GHz signal will be received 3dBm stronger, which in turn will make most devices choose 2.4GHz signal instead of the 5GHz.

On channels 100–140 the maximum transmit power is 1W (30dBm) and the channels can be used outdoors as well. In access point use 30dBm is irrelevant, but for point-to-point connections this enables long distance links (from 10km to 50km or even more). Weather radars use channels 120–128 and access points must yield to them. At start-up the access points will listen for radar signals for 10 minutes before transmitting. On other DFS channels 52–140 this start-up delay is one minute. If the access point detects a radar signal it will switch channel automatically. Most APs will play it safe and choose a non-DFS channel 36–48 which may result in overlaps in channel use.

The upper channels 149–165 are on every fourth odd channel. In Europe they can be used according to Short Range Device (SRD) specification for transmissions up to 25mW (14dBm), but most devices don’t support these channels. For access point use the 14dBm would suffice and there are no DFS or other restrictions, but the sparse client support needs to tested before deployment.

Coverage and cell size

The wavelength of 5GHz is half of 2.4GHz, which implies higher attenuation. 2.4GHz will be received at 6dBm stronger or quad-fold when compared to 5GHz signal. A 5GHz access point will thus cover a smaller area in open space and won’t penetrate walls like 2.4GHz. Because of the stronger signal many devices will rather associate with the 2.4GHz AP. The simplest solution is to reduce the transmission power of the 2.4GHz AP by 6–7dBm.

The higher attenuation and poorer penetration can be turned into an advantage to reduce access point cell size. When the AP covers a smaller area there will be less users to compete for airtime, which translates to faster data transfer. You will need more APs to cover the area, but smaller cell size is the key to high performance WiFi.

Wide channels

802.11n introduced the concept of combining channels. Combining two 20MHz channels will yield over twice the bandwidth, since there is no need for an isolation gap between channels. In 802.11n you could combine channels on 2.4GHz as well, but there really are not enough channels available. On 5GHz combining channels is actually useful and 40MHz channels appear to be currently default on most access points.

Combined channels need to be accounted for in channel planning. If you place two adjacent access points on channels 36 and 40 and enable 40MHz channels, the APs will end up taking turns. The AP on channel 36 will use channels 36–43 and the other will use 40–47. Due to the overlap they cannot transmit or receive at the same time. You should place them on channels 36 and 44 to account for this. In the standard the 40MHz channels are numbered 38, 46, 54… to avoid overlapping, but most user interfaces seem to use 20MHz numbering.

802.11ac introduced 80MHz and 160MHz channels. They have their own channel numbers as well, because extra wide channels are so easy to set to overlap. Using such wide channels makes even the 5GHz band crowded. Another problem is wait time for the channel availability. If there are other APs in the neighborhood our AP cannot transmit before all the channels are quiet at the same time. 802.11ac provides for dynamic channel width, which turns the setting to a maximum and the AP will choose the used channel width according to the environment. The extra wide channels also require support in the user device as well to be used. 160MHz channels are a Wave 2 feature so there is not much support at this point. In reality you cannot make a channel plan with just two channels so 160MHz should be reserved for point-to-point links where they really are useful.

The maximum transmission power set by the authorities is for the whole transmission. The maximums are calculated for 20MHz channels. The maximum should be halved (-3dBm) for 40MHz, quartered (-6dBm) for 80MHz and only one eighth (-9dBm) for 160MHz. Usually this doesn’t matter for access point use, since the maximums shouldn’t be used anyways. In point-to-point links it does matter and occasionally you need to concentrate the power on fewer channels to get a stable link. A double channel with the same nominal transmit power will also consume twice the electric power, which is important factor for mobile devices. If the wide channel will respectively increase the transmission speed (i.e. shorten transmission time) then it will cancel the increase in power consumption. In practice the power consumption will increase somewhat due to retransmissions.

20MHz channels are still very useful and often recommended. Especially in noisy environments or with lots of APs. Wide channels pick up noise on the whole channel width. Narrow channels pick up less noise. If there are many APs within reach, then it is better to assign each AP a separate channel. There are twice as many 20MHz channels than 40MHz channels.

Recommendations

Compatible user devices should be steered to 5GHz since there is more capacity and less interference. The simplest way is to turn down the transmission power of the 2.4GHz to the minimum or turn it off altogether.

40MHz channels on 5GHz are well supported and increase bandwidth. You just need to plan the channel use not to cause overlaps. Even if the original channel plan is perfect, DFS may cause unexpected channel switches causing overlaps. If you have a quiet environment and your devices support them, you may use 80MHz channels. One example of consideration is the fact that the lowest 80MHz will cover all non-DFS channels. If you want to use the wider channels you have to live with DFS restrictions. Don’t use 160MHz channels except for point-to-point or other special cases.

Related articles:

  • WiFi 2.4GHz band
  • What are WiFi DFS frequencies and should I care?
  • Weather radars in Finland
Author Petri RiihikallioPosted on 05.02.201806.05.2022Categories WiFi19 Comments on WiFi 5GHz band and wide channels

WiFi 2.4GHz band

The original Wi-Fi (also known as 802.11) used the 2.4GHz band. It is still the more popular band since virtually all devices support it. That makes it more crowded and it is also more prone to interference than the alternative 5GHz band.

WiFi 2.4GHz band

This article is a more technical in nature, but understanding underlying technology is the key to successful deployment and utilization.

Channels

The band covers 2,400–2,485GHz which makes it 85MHz wide. It was already split into 5MHz channels before WiFi was invented. 5MHz is too narrow to be very useful in computer networking, since narrow band can only transfer limited amount of data. The original 802.11 and its successor 802.11b used 22MHz channels which covered five 5MHz channels. The later 802.11g and 802.11n used more efficient OFD modulation with 20MHz channels.

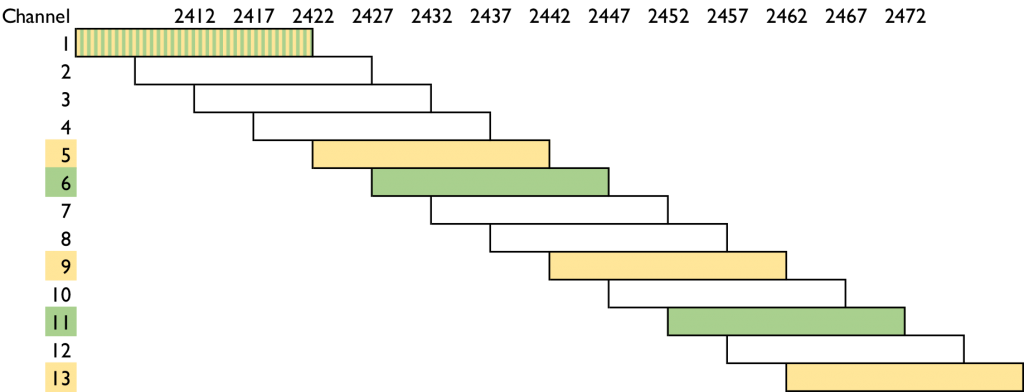
In Europe (in ETSI jurisdiction) and in most of the world there are 13 separate 5MHz channels. In Japan there are 14 channels but in the U.S. only 11. Channels are referred to by its number or by its center frequency. In the illustration the channel numbers are on the left and the frequencies at the top. The bars denote the 20MHz bandwidth the WiFi channels use.


2.4GHz channels
2.4GHz channels

In theory the yellow bars 1, 5, 9 and 13 would form four distinct channels with no overlap. Unfortunately most WiFi radios assume wider 22MHz channels so they receive a signals from the adjacent channels as well. If the radio detects a transmission it will wait for the channel to vacate. This can make adjacent radios (on channels 1 and 5 for example) take turns, which halves the throughput.

In the U.S. you can only use three distinct channels: 1, 6 and 11. They are marked green in the illustration. There is one free 5MHz channel between them, so there won’t be any need for the turn taking. Three channels also suffices to form a grid in a plane where no adjacent radios will ever be on the same channel. You will run into trouble though, if your scene is not a plane: open stairs, atriums and the like or if the signal passes through the floors.

The access points on the market default to one of the American channels, so it is safest to stick to the same system also in Europe. If there are next door APs on channels 1 and 6 then your AP on channel 5 will wait for both to cease transmitting for it to get a turn. If you use 1, 6 and 11 you only need to wait for one AP only. Another problem is that all client devices don’t support channel 13, which may cause mysterious holes in coverage as the user moves between access points.

Coverage

The maximum transmission power on 2.4GHz is 100mW or 20dBm. That is more than enough since most mobile devices transmit below 20mW (13dBm). Since the connection is bidirectional there is no point of having an AP with large coverage if the clients cannot transmit back.

The wavelength of 2.4GHz is twice the wavelength of 5GHz which by law of nature means there is less attenuation. 2.4GHz signal will appear 6dB or quadruple stronger compared to 5GHz. This translates to much larger coverage in open space or better wall penetration. Metal will still block both signals and just a thin foil or mirrored glass is enough. In practice the better coverage of 2.4GHz often causes problems, since most devices will pick the stronger signal. That is 2.4GHz over 5GHz, even though we usually would like to steer the clients to 5GHz for more capacity and throughput and less interference. The solution is to turn down transmit power of the 2.4GHz by 6–7dB.

Interference

The WiFi uses unlicensed spectrum which is free for anyone to use as the term suggests. 2.4GHz is very popular and has many applications. Many wireless devices and gadgets use the same frequencies with no coordination whatsoever. Examples like burglar alarms, wireless CCTV cameras, motion detectors, video drones, BlueTooth… In case of a collision one or both of the devices just won’t work.

There are lot’s of interference sources on 2.4GHz as well. Devices with electrical motors, microwave owens and some light sources may cause interference. The latest menace is USB3 which just happens to use the same frequency. Many cheap USB3 cables have inefficient shielding, which may prevent using 2.4GHz WiFi at least on that computer. Interference is often a by-product which won’t have any effect on the device itself. It may be difficult to pinpoint the source without special equipment like a spectrum analyzer.

Congestion

Since all devices support 2.4GHz WiFi it is often deployed “just in case”. It can also be used to fill in coverage holes left in 5GHz. Therefore in practice all access points transmit on 2.4GHz causing congestion.

All WiFi devices listen on the channel before transmitting to avoid collisions. If the device detects a transmission it will wait and then listen again. In a congestion there will be many devices waiting and only one gets its turn at a time while others continue waiting. The waiting times can grow which translates to long delays and low throughput.

A couple of examples in downtown Helsinki:

995 APs on 2.4GHz and 4 on 5GHz

A UniFi controller reports on the neighbouring APs it detects. In this case 995 access points (not users!) were detected on 2.4GHz in the last 24 hours while on 5GHz there has been four.

Channel usage
2.4 and 5GHz channel usage

WiFi Explorer shows the signal strength as columns. The width of the column is the channel width. On the left there are 2.4GHz channels 1–14 and on the right the 5GHz channels 36–165. Quite a bit less crowded on 5GHz!

Recommendations

If you don’t need 2.4GHz then don’t deploy it. It is perfectly all right to turn it completely off. Some very old or cheap mobile devices may only support 2.4GHz WiFi, though. IoT devices like thermometers and motion detectors are new players on the market. Some of them only support 2.4GHz. In that case you need to deploy 2.4GHz of course. Just turn down the transmit power so no 5GHz capable device won’t associate with it by accident.

In theory 802.11n supports 40MHz channel width also on 2.4GHz. In theory this will more than double the throughput. In theory. In practice 40MHz channel requires devices to wait for silence on two channels at the same time before they can transmit. The end result may very well be less throughput. Another matter is that only one 40MHz channels will fit in the 2.4GHz band making it useful only in scenarios with only one access point. In 5GHz wider channels are the norm and they actually work.

Author Petri RiihikallioPosted on 23.01.201820.10.2018Categories WiFiLeave a comment on WiFi 2.4GHz band

How to build a working WiFi in an older residential house

Modern WiFi coverage is needed in older residential houses as well. It isn’t always easy to achieve. Here are a couple of design points to consider.

How to build a working WiFi in an older residential house

In a smaller, wooden house a single access point may provide good coverage for the entire building. Nice and easy. But if you have a multifloor brick and/or concrete construction, you are in for trouble. Many houses are built like bunkers: reinforced concrete floors and sturdy walls that kill all WiFi signals. You will need multiple access points per floor. For the access points you will need a wired distribution network. Wireless is only for the last hop to the device, the access point needs a wired feed. Unfortunately only 21st century houses tend to have high speed network cabling built in. In older buildings the distribution network is often the main challenge.

Wired Network

Using the power lines for networking is a popular alternative, if you search for solutions. Unfortunately the results are most often not even close to the expectations. This is easy to test. Just plug the powerline adapters to adjacent power sockets and test the throughput. It might be a measly 30 Mbps instead of the hundreds advertised on the box. With more distance the speed will drop even lower. If the sockets are in separate fuse circuits you need an electrician to bridge the circuits. But still you won’t get the throughput you need.

Another widely offered alternative is to use wireless for the distribution network. It is called Mesh WiFi, WiFi repeater or Wireless Distribution System (a.k.a. WDS). The inefficiency will cause problems because there will be so much wireless traffic going back and forth. The net effect is a slow network. In the best mesh access points there are two radios: one for the clients and one for the backhaul, but they tend to be pricey.

Most houses have telephone cables connecting the floors. In the best case the cabling is not used anymore at all. If the telephone cables are installed in tubes inside the walls, you can easily replace them with Ethernet cables. Every access point will need its own feed (cable), but there is not room for many cables in the tube. The professional solution is to put a network switch on every floor and run only one Ethernet cable between the floors. If you only need a couple of access points on a floor, you might get by using twin Ethernet cables. Actually, you can use a single Ethernet cable to transfer two 100 Mbps connections because only from gigabit up are all 8 wires used. With twin cables you can run 4 x 100 Mbps in a single tube. Is it reasonable to install 100 Mbps Ethernet today? In residential use it should be plenty for the next 10 years or so (unless you have fibre connection from the house). Even if the phone cables are installed on the surface, you may still use four wires to get speeds up to 100 Mbps. Either way, you can still use the old phone system to get a neat and inexpensive distribution network. If that is not possible, you need to run cables through ducts, a stairwell or on outer walls, increasing the amount of work to be done.

In every case the cabling job is best left to professionals. They have the tools to install and test the connections. Most electrical, telephone or data service shops do cabling. Ask for a couple of tenders and take your pick. Just make certain that all the cables will be tested and you get the report. A proper tester will cost well over a thousand Euros, so the handyman next door may not have one. All professionals do.

Wireless network

You will need multiple access points per floor to get good coverage through brick walls. Even if you can crank up an access point to cover the whole floor, the cell phone in the last room can’t reach back to the access point. With multiple access points the administration needs to be organized. Manually keeping just five access points in synch regarding all settings and updates is a chore. Ubiquiti has affordable access points and the central controller software is included. The Ruckus brand XClaim would be another alternative, but XClaim doesn’t seem to have a distributor in Finland at the time of writing.

The access points need power to operate. The neatest solution is to feed the power over the Ethernet (a.k.a. PoE). The network switch provides the power, so the switch needs to have a power supply big enough for all the access points. There are two standards for PoE: older 802.3af and later 802.3at (a.k.a. PoE+). Latest 802.11ac access points are power hungry and often require a PoE+ switch. Some vendors have their own, non-standard PoE solutions (often called “passive”). In that case it is best to stick with the same brand for access points and switches to ensure compatibility.

Links

  • Ubiquiti UniFi
  • Verkkokauppa.com UniFi (a Finnish retailer)
  • XClaim
  • AmpliFi (mesh network)
Author Petri RiihikallioPosted on 18.12.201719.12.2017Categories Ubiquiti, WiFiTags 802.11ac, PoE, Ubiquiti, XClaimLeave a comment on How to build a working WiFi in an older residential house

Set up a free https certificate for your web server by Let’s Encrypt

Improve your search engine visibility by moving to https connections!

Set up a free https certificate for your web server by Let’s Encrypt

Let’s Encrypt is a project aimed at making the internet safer, at least a bit. The means is to automate PKI certification creation to the point when the price drops to zero or at least close. Let’s Encrypt hands out their certificates for free, although donations (even small ones) are welcome. Google is encouraging https connections by ranking them higher in search results. Chrome browser has started warning about non-https sites.

If your web hosting provider supports Let’s Encrypt, start using it. Even if they don’t mention it on their pages, you can still ask why it is not supported. Especially if they have links for commercial certificate providers.

If you run your own servers you have to work little harder. The automation behind Let’s Encrypt means that there is no web user interface for the service. You need to have a script on the server that will install and renew the certificate automatically. EFF provides CertBot that makes this easy on most Unix-like operating systems. Installation and deployment depend on the OS and web server, but EFF’s web page has instructions for the most popular ones. There are several alternatives for Microsoft Windows.

In general you need to create a hidden directory .well-known on your web site, where the script will create a file for the duration of the transaction. This is how Le’ts Encrypt can verify that the request comes from the correct domain. This verification method can cause problems, because the domain on the certificate must be accessible from the internet by https. For example you can not get a certificate for an internal-only website like an intranet (at least without some extra steps) or non-http services unless they are on the same server as the http server.

The script will save the public and private keys on the disk. You can set the file path in script settings, but the default is fine as long as you add the full paths to your web server configuration.

The certificate will be valid for 90 days only, but thanks to the automated renewal you won’t notice when it is renewed. Let’s Encrypt recommends running the script twice a day to ensure smooth renewal. Most of the times the script will do nothing, so it does not tax your server.

The certificate on this site is from Let’s Encrypt. You can check it by clicking on the lock symbol in the address bar (or whatever symbol your browser uses).

Links:

  • Let’s Encrypt
  • CertBot
  • Alternatives for CertBot
Author Petri RiihikallioPosted on 21.11.201707.12.2017Categories General, SecurityLeave a comment on Set up a free https certificate for your web server by Let’s Encrypt

A solution for poor LTE signal strength?

Mikrotik SXT LTE is an outdoor LTE modem and router, that may provide a far better signal and data rates for fixed installations than an indoor solution.

A solution for poor LTE signal strength?

The best solution for a network uplink connection is fibre, but it is not always an option. Cellular data may deliver more bandwidth than ADSL connections which utilise old phone copper wires. WiFi-router-firewall-LTE combo boxes are gaining popularity for a reason. It is a unit that looks like a WiFi access point but contains a SIM card slot for uplink connection. In Finland these are common even in fixed locations like homes, small offices and rural locations because unlimited cellular data plans have been inexpensive. Too bad that many have been disappointed by the actual data rates they are getting. Concrete or brick buildings, especially with modern thermal glasses, are very good at keeping cellular signal from getting inside the building. In rural area the distance to the cell tower is often too long for good data rates. What can you do?

The most common solution is an external antenna. The problem with that solution is attenuation in the cable. As a rule of thumb the loss is 3dB per meter and an additional 3dB per connection. For a 5 meter (17 feet) antenna cable that totals for 5*3dB+2*3dB or 21dB loss. Since the internal antennas are typically 2dBi you would need to install a 23dBi external antenna just to get equal signal level. Of course you can install a 30dBi antenna for a 7dB net gain, but such high gain antennas have very narrow beams. Narrow beam requires precise alignment. If the antenna is just slightly off or moves with the wind,  you may end up with much worse signal than the internal antenna already provided.

MikroTik SXT LTE

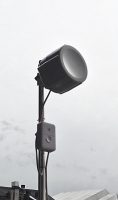
MikroTik SXT LTE (~200€) is an outdoor antenna-LTE modem-router combo. The antenna is in the same box, so the antenna cable is just an inch long. The gain of the antenna is 9dBi (eightfold signal) but is not too difficult to align. The device is connected to the internal network by ethernet cable, that can be 100 meters long without any decrease in data rates. You could place the device on a nearby hilltop, if that’s what is obstructing your connection. The ethernet cable also supplies power, so you don’t need to worry about providing power. Just keep in mind that you need to use weatherproof ethernet cabling and protect it from surges. If the cable is longer than a stub, you need to put surge protectors at both ends.

MikroTik SXT LTE
MikroTik SXT LTE & Ubiquiti surge protector

SXT LTE can receive at 100Mbps and transmit at 50Mbps. The ethernet port is 100Mbps. There are LTE data plans with higher nominal rates, but SXT LTE cannot take advantage of them. The device comes with a 24V power supply and an ethernet adapter. For longer cable runs you should consider upgrading the voltage to 48V to minimize losses. The maximum rate is 57V.

Deployment

Under a small protective door there is an ethernet port and a place for a legacy SIM card. The door is made of hard plastic, but seems to be fairly weatherproof when closed properly. There is no seal, so putting some sealing tape over the door seams and the ethernet opening should be considered. SXT LTE comes with hardware for mast attachment, but no surge protectors.

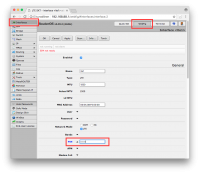
MikroTik routers use IP address 192.168.88.1 by default. You can connect to it using a browser or MikroTik’s WinBox application. The default username is admin and password is empty. The only required setting is the PIN code for the SIM card, if it has one. The default is empty. In the browser user interface the path is: top right WebFig > top left Interfaces > select lte1 > enter PIN.

MikroTik WebFig
MikroTik WebFig

The outdoor device doesn’t contain an ethernet switch or a WiFi access point, so you need to provide those in the internal network. Usually they also provide a DHCP server that you need to switch off. A DHCP server provides IP addresses for clients, usually from subnets 192.168.0.0/24 or 192.168.1.1/24. If the clients get one of those addresses, they won’t be able to connect to the SXT LTE, because it is in a different subnet. The SXT LTE also runs a DHCP server by default providing addresses from subnet 192.168.88.0/24, but it has a two second delay. If there is some other DHCP server in the network, it will serve the clients first. That’s why you need to turn off all other DHCP servers. Typically this is the only configuration change required for the internal network.

Downsides

LXT LTE only supports LTE bands 3 ja 7 (1800MHz and 2600MHz), there is no support for GPRS or EDGE. The fourth generation LTE network is not ubiquitous, so outside of it you need to find another solution.

The cell operators don’t volunteer their tower locations or info on the frequencies in use. This makes them free to change them without notice, since the customers aren’t promised anything. Unfortunately without tower location antenna alignment becomes a manual process. SXT LTE has five LEDs to show the signal strength, so you can align it at least approximately. Fortunately the 9dBi antenni is not too directional.

Different cell operators may have very different signal strength in any given location. You should have a handful of SIM cards to try when installing. The best signal for another operator may come from a different direction, so you should re-align the antenna for each SIM card.

Links:

  • MikroTik SXT LTE
Author Petri RiihikallioPosted on 07.11.201707.11.2017Categories MikroTik40 Comments on A solution for poor LTE signal strength?

Ubiquiti UniFi WiFi product line

UniFi network devices share common management through UniFi Controller. However, how all the pieces fit together is not obvious at first sight.

Ubiquiti UniFi WiFi product line

In the beginning access points were expensive and a single access point was the norm. When more coverage was needed a second one was added, then a third… Managing and updating the access points one by one turned out to be time consuming. The solution was to manage all the devices from a single point. Ubiquiti UniFi is one of the least expensive such solutions.

You don’t have to replace all your network gear with Ubiquiti brand. You can just get an access point or two and configure them using your existing network. However, there are appealing management benefits, because you can control everything from a single interface. In most cases, you still need an external LTE modem, ADSL modem, WISP CPE or a fiber media converter to get the Internet feed to the Ethernet port on the Ubiquiti Security Gateway.

UniFi Network
UniFi Network

Access Points

Ubiquiti has also older, 802.11n based access points, but this article covers the new 802.11ac hardware. All the new models support the old standard as well on both bands (2.4 GHz and 5 GHz). The indoor access points are designed to be mounted on the ceiling and they look like smoke detectors. The blue led can be turned off, so you can install the AP in a bedroom ceiling without disturbance.

UniFi access points receive their power over the Ethernet cable (PoE). Older Lite and LR access points required non-standard 24 passive power, but all current models use standard 802.3af/at (PoE or PoE+). Single units come with mains power injectors, but multi packs don’t. The most common solution is to provide power from the switch, which must support PoE or PoE+.

  • UniFi AP AC Lite is the least expensive access point for home or small office use. The device is physically smallest, it has just two radios per band, requires least power and is the most modest capacity wise, of course. The radios and antennas are good, though, so the coverage is still good.
  • UniFi AP AC LR means Long Range. You can turn up the transmit power, but not beyond regulated limits, so this doesn’t give any advantage in Finland. The LR-antennas have little more gain than the standard antennas, so you do get somewhat better range.
  • UniFi AP AC Pro has three radios per band and two gigabit Ethernet ports. It has significantly better capacity than the Lite or LR models.
  • UniFi AP AC HD or High Density has four radios per band and even more computing power. As an 802.11ac Wave 2 device it can serve multiple clients at the same time (MU-MIMO) which gives a big boost in areas with many clients close to each other: meeting rooms, auditoriums, restaurants, stadiums, exhibition halls etc. The HD is larger than the other models and requires 802.3at or PoE+ power.
  • UniFi AP AC SHD is a High Density access point with an extra receiver for spectrum analysis and functions for intrusion detection. The S in the name stands for Security.
  • UniFi AP AC Mesh and Mesh Pro are respectively two and three radio outdoor access points. The Mesh refers to wireless links between access points, but connecting each access point directly to Ethernet will make a far more efficient network.
  • UniFi AP AC In-Wall and In-Wall Pro are designed to replace an in-wall Ethernet outlet. It contains two Ethernet ports and a built-in access point. In-Walls makes it easy to bring access points close to users.
  • UniFi AP AC Edu is a special model for educational use. The access point is mounted inside of a loudspeaker to create a public announcement system.

You can mix and match all kinds of access points as you need: Lites to offices, Pros to lobbies and cafeterias and HDs to auditoriums.

Switches

Switches are basically just Ethernet splitters. You can chain switches, but keep the chains short. There are UniFi switches with and without Power over Ethernet (PoE). Not all PoE models provide passive 24V, which is required for some older UniFi access points. There are models with 8, 16, 24 or 48 ports per switch. Otherwise, the UniFi switches have all the features you expect in a switch: gigabit ports, SFP-cages, VLAN and QoS support and so forth.

Routers

UniFi Security Gateway a.k.a. USG is a router, firewall and DHCP-server. To connect to the Internet, you need a router to pass traffic between your internal network and the outside world. Often your ISP will provide an appliance, but if that is not the case, USG will do the job. The firewall in USG looks inside the packets (Deep Packet Inspection) to classify traffic instead of relying only on IP addresses and ports.

USG has two WAN-ports for connecting to the Internet. The device can use both simultaneously for higher throughput or the other can be a spare. The traffic will fail over to the spare connection if the primary connection is lost. For example you can set up a LTE connection as a spare for high availability.

The smaller USG has three ports without SFP while the bigger is rack-sized, four port, more powerful device. There are many firewall vendors out there with similar devices, but managing the USG with the same interface as the rest of the network is USG’s advantage.

UniFi Controller

UniFi Controller is the program to manage the whole UniFi network. The Controller is Java-based software, so it will run on Windows, macOS or Linux. The Controller will recognize all UniFi devices on your network and then you can adopt them to be managed. The software can be downloaded from Ubiquiti’s web site without any license fees. The Controller will start a local web server on the workstation and you connect to it with a browser. The default address is https://localhost:8443.

You don’t need to run the Controller continuously, only when you need to configure or manage the network. If you can run the Controller continuously (e.g. on a server) it will log network events and statistics and you can connect to the Controller from any workstation. The only function that requires a continuously running Controller is the guest WLAN captive portal web site, if you want one.

UniFi CloudKey

UniFi CloudKey a.k.a. UCK is a miniature computer, with UniFi Controller preinstalled. If you want to have a continuously running Controller then CloudKey is an option. It is an integrated computer that fits on your palm. There is no display or keyboard, only an Ethernet cable that will also supply power to the device. You connect to it using a browser. Ubiquiti recommends that you limit the number of UniFi devices to 30 for CloudKey.

Other products

UniFi VoIP is a phone connected to Ethernet. In Finland cell phones and calls are so inexpensive that VoIP phones are not common.

UniFi Surveillance are videocameras and recorders. They are connected to the Ethernet, which will also provide power. You can monitor the videocams with any mobile device or record it on a recorder for later inspection.

Links

  • Ubiquiti UniFi
  • Verkkokauppa.com UniFi (a Finnish retailer)
Author Petri RiihikallioPosted on 31.10.201709.07.2019Categories UbiquitiTags PoE, UniFi2 Comments on Ubiquiti UniFi WiFi product line

8 reasons to turn down the transmit power of your Wi-Fi

By default almost all WiFi access points transmit at full power (100mW on 2.4GHz). This gives maximum coverage and users see a good signal (“full bars”). However, there are good reasons to turn down the transmit power to a fraction of the maximum.

8 reasons to turn down the transmit power of your Wi-Fi

It even makes sense to start with minimum power and increase it until the necessary area is covered.

0. Wi-Fi is about sharing, not competing

In a congested environment it doesn’t matter if your access point is stronger than the neighbor’s. If your AP can receive other APs then it will share the air time with them by taking turns. All APs on the same channel will give other APs equal access to the spectrum. This is how 802.11 was written.
[Edit: I added this point as an afterthought, since this isn’t obvious to many users.]

1. Full power doesn’t increase coverage

Mobile devices like phones and tablets have very limited batteries. To minimize power consumption their radios typically max at 15mW (12dBm), while access points max at 100mW (20dBm) on 2.4GHz and 200mW (23dBm) on 5GHz. However, WiFi connection is always bidirectional. It does no good if the client can receive the AP if the AP can’t receive the client. Have you ever been unable to connect – even though you appear to have good signal? This is the reason.

The bidirectional connection is symmetrical. It doesn’t matter if the AP has a better antenna or is located higher up. The antenna gain and any attenuation factors work symmetrically in both directions. So a good antenna and good location will improve the connection in both directions. Unilateral transmit power increase will only work in one direction.

2. Roaming

In WiFi the client devices decide which access point they want to associate with and when to switch to next. (This is contrary to the mobile telephone network, where access points decide which one will serve which client.) Many devices are very reluctant to roam to another AP. They hold on to the first chosen one even when there is a much stronger AP next to the device. Only when the connection breaks will they associate with the next AP – and keep that connection to the end. This results in clients using far away access points with poor connections. By lowering the transmit power the connection will break sooner and the client will roam to a better access point.

This behaviour affects access point utilisation as well. In the worst scenario the access point by the entrance covers the entire office just barely. When users arrive their devices will associate with the entrance AP and keep using it for the rest of the day. The entrance AP is overloaded while other APs are idle.

3. Battery life

The access point informs the clients what its transmit power is (802.11h TPC, 802.11k TPC or Cisco DTPC). Mobile devices will adjust their transmit power level to match to save battery. The logic is that if the mobile device can receive the AP at that power level, the same applies in reverse as the symmetry was explained earlier. By setting the AP transmit power to 5mW (7dBm) for example, you can increase the battery life of the clients. Such a weak signal won’t penetrate walls, so you need more access points – see the next section Performance…

4. Performance

Back then access points were expensive and they were placed far apart. Now the price is no longer an issue, but WiFi performance is. By adding more access points there will be less clients per AP, hence more bandwidth per client.

Keep in mind that wires are always more efficient than radio waves. The faster and closer you can move the data from radio to wires, the better. That’s why increasing the number of low-powered access points is the key to a high performance WiFi network. Why low-power? See the next section Interference…

5. Interference

A powerful signal will interfere with neighbouring devices even if they are on different channels (frequencies). At high signal levels the whole device will act as an antenna and induction will cause superfluous signals in the circuits. This is why you need to keep access points at least 10′ (3m) apart or have a thick concrete wall in-between, preferably both.

Access points can still interfere with each other, even if there is enough distance. The WiFi channels are not absolute. While the transmission is on a certain channel, the signal bleeds to the neighbouring channels as well, albeit weaker. At high transmit power this weak signal will be strong enough to interfere.

6. Distortion

If you drive an amplifier at full power the output will distort. This is easy to test with a car radio: turn it on full blast and try to make sense of the lyrics. A distorted signal is hard to decode and in WiFi parlance this means transmission errors and retransmissions, which will slow down the network. You can increase performance by lowering the transmit power.

7. Neighbourliness

A strong signal will cause interference in a large area. Even though the extra milliwatts won’t benefit you, they will consume limited air time and interfere with all other WiFi networks in the area (look back at point 0 at the beginning of the article).

Think about it security wise as well: Why should anyone across the street be able to receive your WiFi signal?

8. Longer lifetime

Lower transmit power equals lower energy consumption equals less heat. Operating at lower temperature increases equipment lifetime. While access points are inexpensive, they tend to break at the most inconvenient time and place. You won’t notice the energy savings on your electricity bill, though.

Author Petri RiihikallioPosted on 21.10.201707.02.2022Categories WiFi207 Comments on 8 reasons to turn down the transmit power of your Wi-Fi

WiFi heat maps

It is fairly easy to create a heat map of a WiFi network that shows the signal level across the coverage area. What’s the use, what’s the benefit of surveying and is it worth paying for?

WiFi heat maps

There are many tools available to survey WiFi coverage and draw a heat map. In WiFi heat maps strong signal areas are often drawn in green, weaker signal areas in yellow and problem areas in red, which is the opposite of typical heat maps. If the whole office is inside the green area, does it prove that everything is working fine? It depends, there are different kinds of heat maps telling different aspects of the WiFi network.

Passive Surveying

A passive heat map is the most common one and straight forward to make. Start an application, load the floorplan and walk around marking the points of measurement on the floorplan. The application will calculate the signal between the measurement points and draw a heat map.

In a passive survey only the received signal strength is measured, in other words, how “loud” the access points are. All received access points and networks are plotted, so you can see how nearby networks might interfere with your network.

The problem with passive surveying is that only the received signal strength is recorded. Access points are more powerful than typical user devices, so the received signal strength tells little about connectivity or the quality of the connections. It is easy to create a good looking, green passive heat map: just crank up the transmit powers of all access points. This way the signal can be received as widely as possible, but the clients won’t be able to connect as widely, as the access point can’t receive their signal.

Active Surveying

In active surveying the measuring device is logged on to the network being measured. A connected device won’t report other access points or networks, so you need passive surveying for that. Instead, in active surveying you can map the quality of the connection to the access point: signal strength, bandwidth and error rate. You can also record where the device roams (i.e. switches to another access point), so you can manage roaming zones by adjusting access point transmit powers.

The problem with active surveying is that you are also measuring the measuring device itself. Different devices have different radios and antennas. A premium laptop will give very different results from a cheap cell phone. Even similar devices may have different WiFi drivers with different performance. In the worst cases the version the device driver matters. Active surveying should be performed using the least capable device the networks is going to support.

Interference Surveying

A spectrum analyzer records radio energy on a given frequency. Ordinary WiFi radios try to decode the signal, but can’t report distortions or other sources of interference. Spectrum analyzers don’t even try decode the signal, they just report the amount of energy detected. You need a special device to do interference surveys. In the survey you will detect interference sources like machinery, microwave ovens, cordless doorbells, BlueTooth devices, remote controlled toys and gadgets, cordless security cameras etc. The latest additions to the list are USB3 and LTE-U devices which may interfere with WiFi. On the heat map green areas mark the ares with least interference while red areas may cause problems for the WiFi network. Some analyzers can recognise the type of the interfering device from the interference pattern.

Predictive Surveying

A WiFi network is built into new buildings. How can you design a network for a building before it exists? You can open the CAD files for the building in a predictive survey application. The CAD files detail the locations and materials of walls and floors and the application knows how these will affect the signal. The application can calculate a predictive heat map for the future network. You can move access points on the screen and see the effect on coverage or you can let the application position the access points optimally. Of course you can use predictive tools for existing buildings, if you have the CAD files available. In predictive survey tools Finnish Ekahau is the market leader.

Challenges in Surveying

There are some common pitfalls in all survey types. The biggest one is change. The survey only records the current state. If someone places metal file cabinets close to an access point, the coverage may change completely. Even whether office doors are open or closed matters. Often doors are kept open during surveys, so the results won’t match the daily office use when the doors are closed. Humans contain a lot of water, which attenuates WiFi signal strongly. Twenty people in a conference room will yield a very different heat map when compared to one person doing the survey. The only way to find out about changed external networks and interference sources is to redo the passive and interference surveys periodically.

There are many sources of errors during measuring surveys. The differences in devices was already covered above. The human doing the survey will affect the results: if she happens to stand between the device and the access points or on the other side perhaps attenuating an external interference source. Furniture and materials can change how the WiFi signal attenuates and propagates. Just a decorative shiny film added for design somewhere can make a difference. Modeling all this for a predictive survey can be a daunting tas.

Is surveying useless, then? No, not at all! It reveals a lot of valuable information how the WiFi signal behaves in the area. You just need to keep in mind that a lot of green in a heat map doesn’t automatically prove that the network is performing well. You need to know what the different surveys tell about the network and its environment. Often you need to do multiple surveys for different purposes. You also need to redo the survey once in a while to discover what has changed.

It is a good idea to do an active survey after installing or upgrading a WiFi network. It is a way to see whether the project has met its design goals and can be used as a baseline for future improvements.

Links:
  • Ekahau
Author Petri RiihikallioPosted on 10.09.201704.05.2018Categories WiFiLeave a comment on WiFi heat maps

Posts pagination

Previous page Page 1 Page 2 Page 3 Page 4 Next page

Metis Oy

  • Front Page
  • Fix your WiFi network!
  • Contact
  • Petri Riihikallio

Latest articles

  • Fix GCP UniFi Controller certificate issue
  • CWNE#307, Petri Riihikallio
  • Decibels
  • Wi-Fi Roaming
  • Automatic Wi-Fi channel management
  • WPA3 is the latest Wi-Fi Protected Access
  • Tuning your Wi-Fi by adjusting transfer rates
  • Increase your cell phone battery life with a small change in the Wi-Fi network
  • Wi-Fi Repeaters, WDS, Mesh and Other Wireless Backbones
  • How many users can one Wi-Fi access point support?
  • Networking
    • WiFi/WLAN
    • MikroTik
    • Ubiquiti
  • Security
    • General
    • Wireless
  • Software
    • WiFi
    • WordPress
Metis.fi Proudly powered by WordPress